


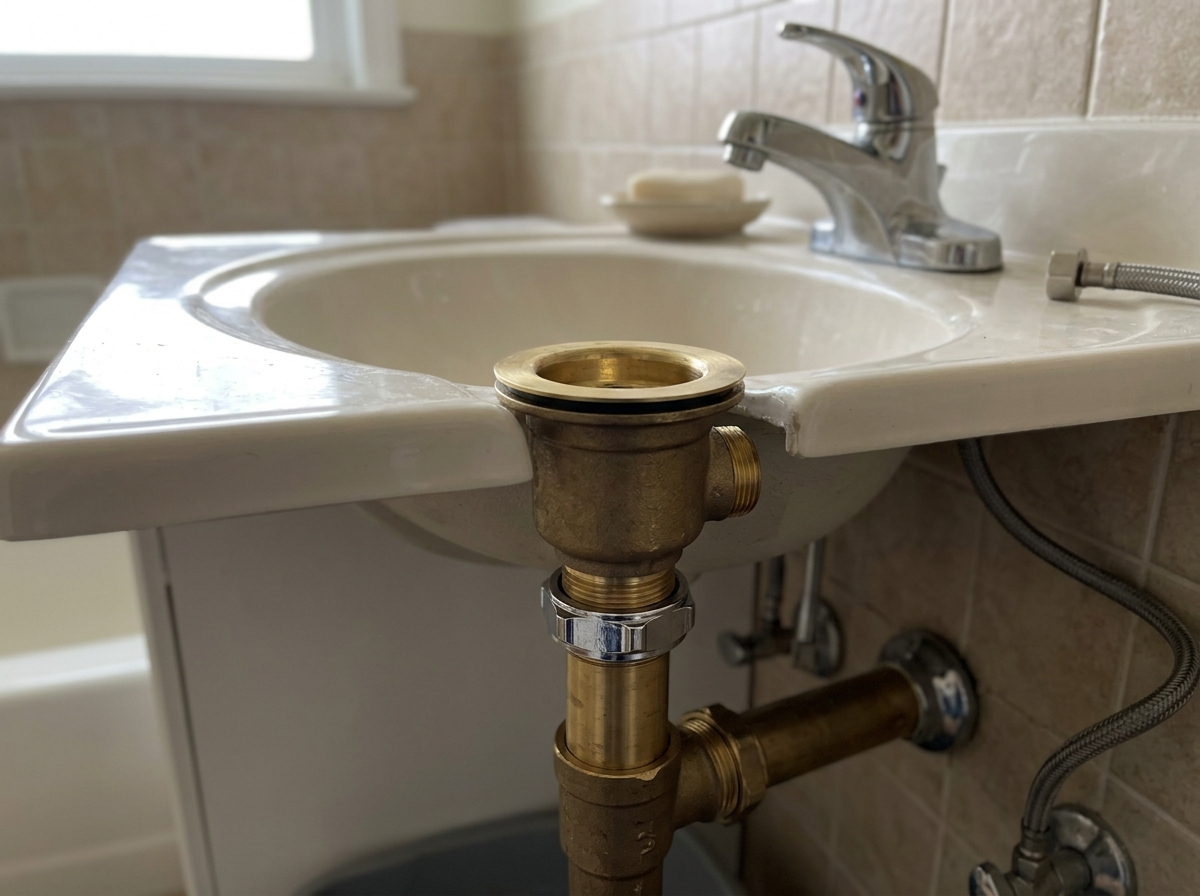
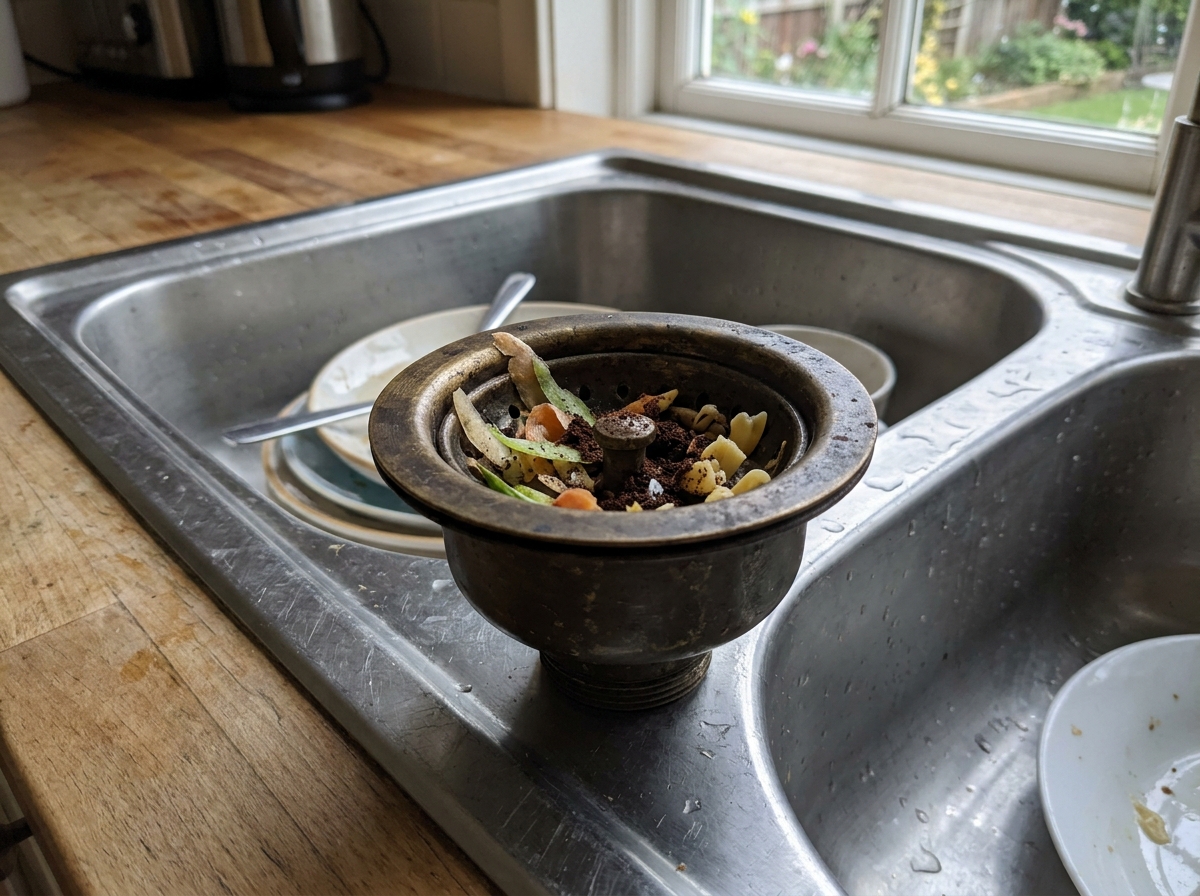
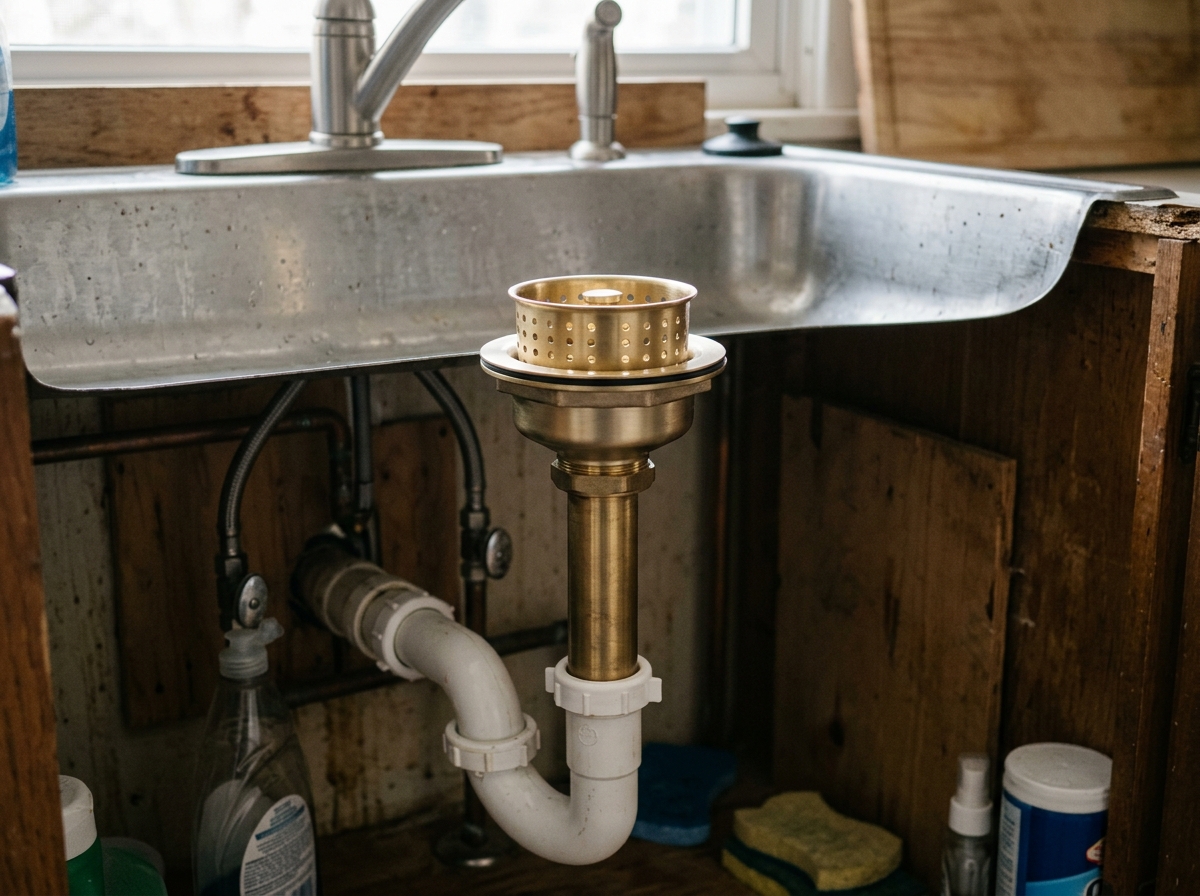


What Compatibility Checks Matter Before Installing a Lavatory Drain?
Before installing a Lavatory Drain, verify the sink opening, overflow arrangement, mounting thickness, flange and washer fit, stopper mechanism, tailpiece, and trap connection. A drain that matches only the visible hole can still leak or fail to operate correctly. Confirm every interface with the sink, faucet clearance, cabinet, and existing plumbing before applying sealant.
- Measure the bathroom sink opening and mounting area before selecting a lavatory drain.
- Match overflow and stopper design; these features are not interchangeable in every basin.
- Check tailpiece diameter, trap position, cabinet clearance, and connection method together.
- Dry-fit the assembly first, then inspect seals and test for leaks before final installation.
A compatible lavatory drain is a complete system match, not simply a part that appears to fit the basin. The selection guidance in this bathroom sink drain guide identifies six practical compatibility areas: the sink opening, overflow design, mounting thickness, flange fit, stopper mechanism, and lower plumbing. This article explains how to check each area for new construction, renovation, replacement, and commercial purchasing.
1. Confirm the Sink Opening and Drain Geometry
The sink opening is the first compatibility checkpoint because the drain flange must cover the opening without falling into it or resting unevenly on the ceramic surface. Measure the opening at several points if the basin is old, damaged, handmade, or heavily coated with mineral deposits. Do not assume that two basins with the same outside dimensions use the same drain opening.
The drain flange must sit flat on the basin surface and leave enough contact area for the specified sealing method. A curved, chipped, contaminated, or uneven landing surface can cause seepage even when the drain body is dimensionally correct. Remove old putty, silicone residue, rust, and scale before dry-fitting the new assembly. A plumbing professional also emphasizes that the opening should be clean and suitable for the replacement components in this bathroom sink drain installation guidance.
| Check number | Area to inspect | Pass condition | Installation risk if missed |
|---|---|---|---|
| 1 | Sink opening | Drain body and flange seat evenly | Movement or leakage at the basin |
| 2 | Flange landing surface | Clean, smooth, and free from damage | Uneven compression of the seal |
| 3 | Mounting thickness | Threaded body reaches the lower washer and nut | Loose assembly or insufficient clamping |
| 4 | Tailpiece position | Outlet aligns with the trap without strain | Stressed joints or difficult maintenance |
2. Match Overflow and Basin Design
Overflow compatibility is essential because a drain intended for an overflow basin may not seal or function correctly in a sink without an overflow. Identify whether the lavatory has an integrated overflow passage, a visible overflow opening, a concealed overflow channel, or no overflow at all. The drain design must correspond to that arrangement.
An overflow drain typically includes passages that allow water from the basin overflow route to enter the drain body. A non-overflow drain is designed differently and may have a solid or closed upper configuration. Installing the wrong style can create an ineffective overflow path, an imperfect seal, or an appearance that does not match the basin.
Overflow location also matters in replacement work. If the basin has a narrow or unusual overflow channel, ask the supplier for a compatibility drawing rather than relying only on a product photograph. For large purchasing programs, record overflow type as a required line-item field so that similar-looking parts are not mixed during picking and installation.
3. Check Mounting Thickness, Threads, and Sealing Components
The lavatory drain must have sufficient threaded length for the basin, gasket, friction washer, and retaining nut used in the actual installation. Measure the thickness through the drain hole and account for any integrated ceramic, stone, countertop, or decorative layers around the basin. A drain that is too short cannot develop reliable clamping pressure; one that is excessively long may reduce cabinet clearance or require an unsuitable extension.
Sealing components should be evaluated as a system rather than selected separately by appearance. Confirm the position and material of the upper seal, lower washer, retaining nut, and any manufacturer-specified gasket. Do not stack random washers to compensate for a mismatch because uneven compression can distort the drain body or conceal a leak during the first test.
Sealant selection depends on the drain instructions, basin material, local practice, and service requirements. Some installations use plumber's putty at the flange, while others require a compatible sealant or supplied gasket. Follow the component manufacturer's instructions and verify local plumbing requirements. The objective is a continuous seal at the basin interface without blocking designed overflow passages.
4. Select the Correct Stopper Mechanism
The stopper mechanism must match both the drain body and the user's operating method. Common configurations include lift-rod pop-up assemblies, push-button or click-clack stoppers, and open-grid or fixed drains. A basin with a faucet lift rod requires a drain body with the correct pivot hardware and enough clearance below the basin for adjustment.
Before installation, compare the stopper height with the basin depth and inspect the sealing surface. The stopper should move freely, sit centrally, and close without contacting the ceramic. For a pop-up assembly, check the relationship between the lift rod, clevis, pivot rod, and stopper eyelet. For a push-button unit, confirm that the drain body is designed for that cartridge and that the cartridge can be removed for cleaning.
Cabinet geometry can determine the best mechanism even when more than one style fits the sink opening. A deep drawer, shelf, waste bin, or narrow vanity may interfere with a pivot rod or tailpiece. Dry-fit the mechanism with the cabinet doors and drawers in their normal positions before tightening the drain.
5. Verify Tailpiece, Trap, and Wall Connection
The lower plumbing connection determines whether the new assembly can be installed without forcing, cutting, or relocating existing pipework. Check the tailpiece outlet, trap inlet, wall stub-out, pipe material, and available vertical and horizontal space. The drain should connect naturally to the trap; it should not be pulled sideways to make up for a dimensional mismatch.
Replacement work requires special attention to the existing trap. Older installations may use a different connection type, a corroded nut, a nonstandard extension, or a trap position that was designed around a previous drain length. Inspect these parts before ordering the visible drain so the project does not stop after the basin is removed.
Confirm the finished height and slope of the waste connection. The trap should remain accessible for cleaning, and joints should be supported without placing bending stress on the drain body. In a vanity with limited space, make a paper or cardboard template of the drain and trap envelope before final assembly.
| Step | Question | If the answer is no | Next action |
|---|---|---|---|
| 1 | Does the drain match the sink opening? | Do not install | Recheck basin and drain dimensions |
| 2 | Does the overflow style match? | Stop selection | Choose an overflow or non-overflow version |
| 3 | Does the threaded body suit the mounting thickness? | Do not force the nut | Confirm body length and washers |
| 4 | Does the stopper suit the faucet and basin? | Do not connect the linkage | Change mechanism or verify parts |
| 5 | Does the tailpiece align with the trap? | Do not stress the pipe | Review extensions, trap position, or layout |
| 6 | Does the finished assembly pass a leak test? | Do not close the cabinet | Disassemble, inspect, reseal, and retest |
6. Consider Material, Finish, and Service Conditions
Material selection should reflect water exposure, cleaning practice, installation environment, and expected service life. Solid brass and stainless steel are common choices for durable sanitary drainage hardware, but the exact alloy, coating, and internal construction should be confirmed in the technical documentation rather than inferred from color or surface appearance.
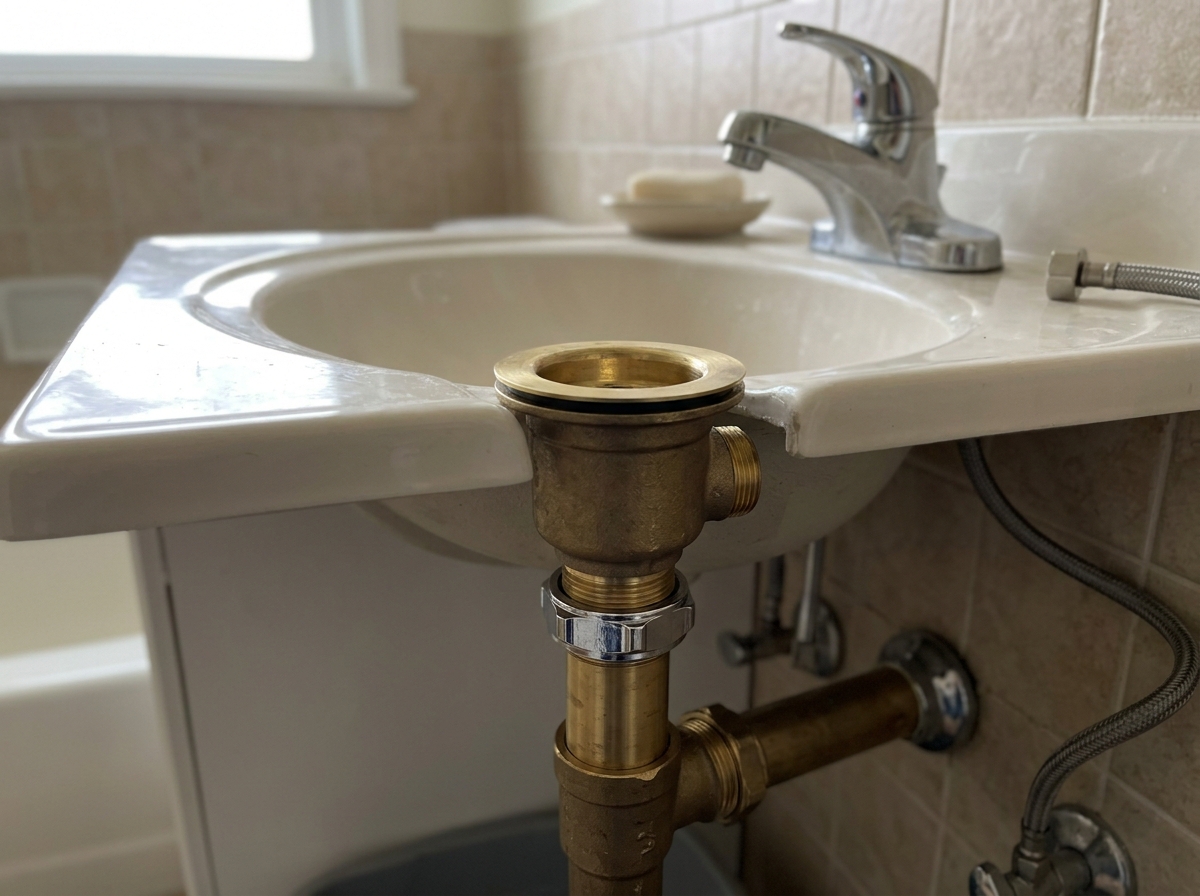
Finish compatibility affects both appearance and maintenance. Compare the drain finish with the faucet, overflow cover, exposed trap, and other bathroom hardware. In hospitality, multifamily, and retail projects, specify the finish code consistently across the bill of materials so replacement parts do not create visible variation.
For commercial or multi-site procurement, ask the lavatory drain manufacturer for dimensional drawings, material declarations, installation instructions, replacement-part availability, and applicable certification documents. The company information supplied for JANA describes a manufacturing history beginning in 1998, production in China and Thailand, and product lines covering lavatory drains, replacement parts, bath drains, shower drains, and Pipe Fittings. These facts can be useful for sourcing discussions, but each project should still verify the exact model documentation and regional requirements.
7. Use a Dry-Fit and Leak-Test Procedure
A controlled dry-fit catches most compatibility errors before sealant makes correction difficult. Assemble the flange, drain body, washers, nut, tailpiece, stopper, and trap by hand first. Confirm that threads engage smoothly, the stopper operates fully, and the cabinet remains serviceable.
- Clean the basin opening and inspect the underside for cracks or distortion.
- Place the upper flange or supplied gasket according to the instructions.
- Thread the drain body by hand and confirm the overflow opening is oriented correctly.
- Install the lower washer and retaining nut without cross-threading.
- Align the tailpiece and trap without forcing the pipe sideways.
- Operate the stopper repeatedly before final tightening.
- Run water into the basin, fill it to a safe level, release it, and inspect every joint from above and below.
- Dry the joints, wait, and repeat the inspection before closing the vanity.
A leak test should examine both static and draining conditions because a joint may remain dry while the basin is empty but seep when water flows through the assembly. If leakage appears, identify whether it originates at the flange, lower washer, threaded joint, tailpiece connection, or trap. Correct the specific interface instead of tightening every nut indiscriminately.
Compatibility Checks for Specific Installation Scenarios
New vanity installation requires coordination between the basin, faucet, drain, countertop, cabinet, and wall connection. Confirm the final centerline and service access before the countertop is permanently fixed.
Replacement installation requires comparison with the removed part, but the old component is not automatically the correct specification. Use it as a reference for overflow style, stopper operation, tailpiece position, and trap alignment, then verify the new part against the basin.
RV and compact-space installation requires special attention to vibration, limited access, lightweight basins, and unusual waste routing. Confirm the drain manufacturer's instructions and vehicle plumbing requirements before substituting residential components.
Commercial purchasing requires repeatability across batches and locations. Request a controlled specification that lists opening compatibility, overflow type, mounting range, material, finish, stopper style, packaging, replacement parts, and inspection requirements. A consistent specification is more valuable than a product name alone.
Frequently Asked Questions
1. Are bathroom sink drains universal?
No. Drains vary by opening, overflow design, mounting thickness, stopper mechanism, flange geometry, tailpiece, and trap connection. Always verify the basin and lower plumbing together.
2. How do I know whether I need an overflow drain?
Inspect the basin for an overflow opening or internal overflow passage. If the basin has no overflow feature, select a drain specifically designed for a non-overflow sink.
3. Can I reuse the old drain washer?
Reuse is generally unwise when the washer is compressed, brittle, stained, or damaged. Use the specified washer or a confirmed compatible replacement and inspect the sealing surfaces first.
4. Why does a drain fit the hole but still leak?
Possible causes include contamination, an uneven flange seat, incorrect washer placement, insufficient mounting length, cross-threading, excessive tightening, or a mismatch between the sealant and installation method.
5. Should the drain be installed before the faucet?
Either sequence can work, but installing and dry-fitting both parts before final tightening helps reveal access, clearance, and linkage problems inside a small vanity.
6. How can I check cabinet clearance?
Measure below the basin for the drain body, stopper linkage, tailpiece, trap, and cleanout access. Temporarily position the components with the cabinet doors and drawers closed before sealing the drain.
7. What should a supplier provide for a project order?
Request a dimensional drawing, material and finish information, overflow and stopper details, installation instructions, replacement-part information, packaging details, and applicable certification documentation for the destination market.
About the Manufacturer and Next Step
JANA PLUMBING is a B2B sanitary hardware manufacturer focused on solid brass and stainless steel drainage products, including Sink Strainers, lavatory drains, bath drains, shower drains, pipe fittings, and replacement parts. Its supplied company information highlights dual-factory production, automated manufacturing, quality control, and service for professional building retail, wholesale, and RV channels. For a project-specific recommendation, review thecompany profile, browse the drainage product range, and use the technical news section before sending an inquiry with your sink opening, overflow type, mounting thickness, finish, and trap details.